How to
Make Wax Candles
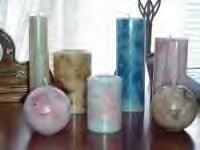
The Wax:
Soft paraffin wax is best suited for making candles in containers.
It is soft and
oily, and is not easily removed from a mold. Its melting point is 129
to 135 degrees.
Soft paraffin wax colors well and has good translucence, but a finished
candle made
from this wax will mar easily and may droop or sag in hot weather.
Medium paraffin wax is a good all purpose wax and works well for tapers,
block,
molded, and free-form candles. It has a melting point of 140 to 145
degrees It is
pliable, colors well, releases easily from a mold, is moderately resistant
to hot weather,
and has a fairly hard finish.
Microcrystalline wax is a soft, oily, pliable wax. Because it is easily
shaped and
sticky, it is excellent for sculpture work or as an adhesive. It has
a melting point
between 160 and 200 degrees. It is difficult to remove from a mold
but
colors well and is very translucent.
Beeswax is a very expensive, fine-quality wax that is often mixed with
paraffin
to make dipped tapers. It has a melting point of 145 degrees. It is
slow burning
and normally smokeless. It is difficult to remove from a mold.
Honeycomb beeswax sheets come in colored 8"x16" rectangles that are
easy to roll into candles. No melting is required.
Bayberry wax has a melting point of 130 degrees. It is a mildly fragrant,
brittle,
greenish-colored wax used mostly for dipping or molding tapers.
The Procedure:
Melting Wax
Precautions
Wax is flammable. It will ignite at about
400 degrees and will smoke and the
color will drastically fade at about 250 degrees.
Most candles require a
pouring temperature of about 185 degrees or
less. While the wax is melting,
constantly check the temperature. Remove the
wax from the heat source
as soon as it reaches pouring temperature
of 165 - 185 degrees. Never
allow wax to reach temperatures higher than
250 degrees.
Double Boiler Method
If you do not have a double boiler, you can use a metal pitcher or similar
container
to hold the wax. Place this container into a larger pan containing
water. Place a
screen wire under the melting container to allow hot water to circulate
underneath it.
Place broken pieces of wax into the melting container and turn on the
burner.
When the wax begins to melt, place a thermometer in the melting container.
If
necessary, add water to the larger pan to maintain an adequate volume
of water
while heating the wax. When wax is melted, add any dyes. (Remember
that liquid wax
will usually appear a bit lighter than when the wax has hardened.)
The wax is ready to
pour at 165 to 185 degrees. The hottest temperature the wax will reach
when using
a double boiler is 190-195 degrees. Wipe any moisture off the melting
container
before pouring the wax into your mold.
Direct Burner Method
To safely melt wax directly on an electric burner, follow these precautions:
Use a melting container that does not leak, and make sure that any
wax on the outside
has been wiped off. Do not use seamed cans, old cooking pots with riveted
handles, etc.
Always start melting wax on low heat. When you have at least one inch
of liquid wax
in the container, then you may turn the heat up to medium. Always use
a thermometer,
and never let the wax overheat. If it is allowed to exceed 270 degrees,
it will change color.
The best way is to pour at 165 - 185 degrees.
Never leave the stove unattended; wax will melt rapidly. If you must
leave the area,
even for a few moments, turn off the burner and remove your
melting pot from the stove until you return.
Combined Method
Start melting your wax using the double boiler method. When the wax
has been
completely melted, remove the melting container from the water and
wipe it clean.
Place the melting container directly on the burner. Keep the thermometer
in
the wax until the correct pouring temperature has been reached.
Pouring
Check the temperature of the wax with a thermometer. The pouring temperature
will
depend on the type of wax you are using. When you are ready to pour
the wax,
tilt the mold slightly and pour wax slowly down the inside of the mold.
Do not pour
the wax too quickly, as this will cause blemishes in the candle. When
the mold is full,
place it in an upright position and draw the wick taut (but not tight)
to the center of
the wick holder, which will lie across the top of the mold.
Cooling
Place the candle mold in a draft-free area to cool. As the candle cools,
a film will
form over the wax with a depression in the middle. Puncture this film
near the
wick to allow a cavity to grow as the candle cools. Be sure to break
all the way
through the film to the liquid wax. This allows the cavity to form
without distorting
the candle. When the cavity is perhaps 1 inch deep, fill the cavity
with liquid wax
(about 185 degrees). Do not overfill the cavity as wax may flow between
the candle
and mold causing the candle to stick. Repeat this process of puncturing
the film and
adding more wax several times as the candle continues to cool and harden.
When the
candle is completely cool it may require one more filling. The smaller
the candle the
fewer times this step is required.
If you wait until the candle is cool and hardened before filling the
cavity, you
may cause a fracture to appear in the base of the candle. This is because
the
hot wax causes a rapid expansion of the cool candle.
The complete cooling process from the time of pouring to the removal
will
vary according to the size of the candle.
Removing
the Candle from the Mold
To extract the candle from the mold, remove the rubber plug. Let the
wick hang free.
If the candle does not drop free from the mold, chill the candle while
in the mold
in the refrigerator for a short time. Lightly tap the mold to free
the candle. Do not
bang or tap the mold directly on any hard surface. You will damage
the mold thus
making it impossible to remove the candle.
Candle
Coloring
Our high quality concentrated color chips are formulated from aniline
dyes to give
clearer and brighter shades. These sediment-free dye chips will color
approximately
11 pounds of wax to a nice medium tone. Add shavings from the color
chip to
melted wax until the desired color is obtained. For lighter colors,
use very little.
To judge the color of the wax, pour a small amount into a container
to cool.
Remember that melted wax always appears lighter in color
than when it is cooled and hardened.
Powder dyes are highly concentrated, lightweight particles, therefore
extreme
care should be exercised when mixing. It is recommended to dissolve
the
powder dye into melted stearic acid before adding to melted wax. Adding
powder dye directly to melted wax may form a sediment (undissolved
dye particles).
Candle
Scent
For best results, add the scent just before pouring the candle. Make
sure to mix
thoroughly to blend the oil from the fragrance with the oil of the
wax; otherwise,
bubbles may form in the surface of the candle. One half ounce of fragrance
should
give a pleasing scent to approximately 11 pounds. If a heavier scent
is desired, use
approximately half of an ounce with 4 pounds of wax. Be aware that
scents may
change the color of the candle.
To add scent to an unscented candle, burn the candle until a one inch
diameter
pool of melted wax has formed. Adding a few drops of scent to the melted
wax with
an eye dropper and you have created a nice soft aroma that will last
approximately one and a half hours.
Do not use perfumes or colognes as they contain alcohol, and do not
mix well
with the wax. They will have no aroma when they burn. Never dip the
wick
directly into the scent; because this will cause your candle to smoke.
Scent
should be stored in brown bottles, and preferably in a dark place,
because
sunlight will destroy your fragrance.
Colored
Layers
You can create candles with different colored layers. Pour different
colors of wax,
one on top of the other producing horizontal stripes, or blend layers
to form a
soft graduated look. You can vary the thickness of each layer. You
can alternate
colors to form a pattern, or each layer can be a different color.
When creating a layered candle, each layer must cool until a firm but
warm crust
forms on the wax before the next layer is poured. Pour the wax slowly
and gently.
Do not cool too long or the cooled layer may shrink, allowing hot wax
from the
next layer to seep down the sides of the mold.
If a blended appearance is desired, pour a light color of wax first.
Each layer
thereafter is a progressively darker shade of the same color. The colors
will
blend together depending on how cool each layer is before next layer
is poured.
Chunky
Candle
Chunky candles are a favorite project for many candle-makers. These
candles have
colored chunks embedded in translucent wax. Chunky candles are economical
because the chunks can be made from leftover wax, old candles or crayons.
Prepare the wax chunks. To make your own colored chunks, pour concentrated
colored wax into a shallow metal pan that has been coated with silicone
spray.
Pour the wax to approximately to one half inch in depth. Allow the
wax to cool
until it is firm but still warm and pliable. Take a knife and cut into
one half to one
inch squares. Leave the chunks in the pan until they are completely
cool, and they
will easily snap out of the pan. You may also use an old ice cube tray.
Prepare the mold with the wick centered at top and bottom.
Fill the mold with wax chunks, being careful to keep the wick centered.
Fill the mold with extra hot wax (approximately 200 degrees). This
wax needs to be
translucent; therefore no additives are needed.You may need to add
more
chunks as you pour, because the chunks in the mold will settle. You
can also
drop wax chunks into the mold after it is about one third full with
hot wax
(at approximately 200 degrees). This will give your candle a smoother
finish.
Roll the candle in hot water or use a propane torch to melt away extra
wax
and expose brightly colored chunks.
Wicking the mold in the normal way may cause the finished candle to
burn unevenly.
A better quality chunky candle can be made if a thin taper candle is
used
instead of a wick. Place the taper in the center of the mold, either
upright or
with its wick through the wick hole at the bottom of mold. Seal the
wick hole
with rubber plugs, and arrange the chunks around taper.


Everything on this entire website
SUBJECT TO CHANGE WITHOUT NOTICE
There are no warrantees
or guarantees for any instructions given on
this website. Use these instructions
at your own risk.